Showing posts with label Sew not plain. Show all posts

Tuesday, February 15, 2011

It's a jungle in here!

You may remember back in November when I made Emily some pretty jazzy pajama pants thanks to a lesson from a woman who is pretty jazzy herself. Well, last month I e-mailed her to set up a second lesson only to discover she doesn't know how to sew clothes! (Okay, this is sort of a lie.  Susan is a fantastic seamstress so she could very well sew clothes, she just hasn't ever done it). I was soooo sad. But, because she is such a doll, Susan referred me to the undeniably fabulous Allison of Sew Be It Clothier.

Allison is a lifestyle ninja (I just coined that phrase). Seven years ago she had a bilateral mastectomy and kicked breast cancer soundly in the rear.   To celebrate she hangs a pink bra - the only one she owns - on her front door for the month of February.  How fab is that?  She works at Costco, teaches sewing, has an Etsy shop, gives her husband a hard time, has a hoppin' social life, and never turns off her coffee pot. This woman seriously knows how to get everything she wants out of life.  I think I love her.

Well, we started talking the second she greeted me at my car door and did not shut up for the next four hours.  It was awesome. And when all was said and done she had shown me how to take this:
Simplicity Pattern 3902
...and turn it into this:
When Emily selected that material I was dubious.  I should have known she'd pick something totally wild based on her past fashion record. But once I started seeing the dress come together, Oh my gosh!
 It came out so well. Just look at that sweetheart neckline! Yeah, I did that!
 It is just perfect for the prowling, posturing, posing, pouncing wildcat that is my Emily!

Thursday, December 2, 2010

Another to-do done: Chair pockets

Waaay back in October I mentioned that I needed to make chair pockets for Emily's classroom. It was a pretty big undertaking, but Em's teacher was so excited about my sewing skills that I couldn't turn her down. Last month we settled on a dark denim and secured five yards of it at JoAnn's. Yesterday I delivered 18 of these babies to a very happy educator.
These things are great in the classroom, but they'd also come in handy at the kitchen table, on patio chairs, and at little person art desks. Want to make some of your own?

First, measure the circumference of your chair back at the widest part. I made the mistake of measuring about halfway down because I failed to notice how the molded plastic flared out as it transitioned into the seat.  As a result, I underestimated how wide I'd need to cut my fabric.  By the time I was finished with my trying and erring I was only able to make 18 pockets instead of the hoped for 20.  Once you have the circumference, divide that number by two, then add one and a half inches for seam allowance. For example, if the circumference of your chair back is 28.5 inches, you will divide that by two (14.25") and add and inch and a half (15.75"). The width of your fabric needs to be at least 15.25 inches.

Next, measure the back of your chair from the top to about an inch above where the back meets the seat. The classroom chairs were 10.5 inches. Now triple that (31.5"). The length of your fabric needs to be at least 31.5 inches.

Now you can cut your fabric.  I'd recommend making one pocket from start to finish so you can tweak your dimensions before cutting a bunch of fabric for assembly-line style sewing. Just trust me on this one.

Because we chose denim, pinking shears were definitely the way to go to keep the fabric from fraying.  If you don't have pinking shears you can sew around the entire perimeter of your cut fabric with a zig-zag stitch.

Like most fabrics, denim has an obvious "right side" and "wrong side."  I wasn't sure how Mrs. Diefenderfer would feel about the wrong side being visible on the finished product so I figured out a way to have only right sides visible.  If you like the look of both sides of your fabric or if your fabric is not one that has a marked difference between the from and back, you can skip the next couple of steps.

I cut my fabric roughly one-third of the way up so I had two pieces; one eleven inches long and the other 21 inches long.
Lay the short piece on top of the long piece so the wrong side is facing up on both pieces of fabric.
Sew your pieces together using a 5/8 seam allowance, then press the seam open.
In the picture above you can see I also hemmed the short ends.  To do this, turn the end over 1/4 to 1/2 an inch and iron it.  Turn it over another 1/2 to 1 inch, iron it, and sew using a straight stitch.
Now, lay your fabric so the wrong side of the long section and the right side of the short section are facing up. Fol the long section until just before it meets the joining seam.

Fold the short section at the seam.. If you did not have to cut and rejoin your fabric you are essentially going to do a tri-fold.

Sew up both sides using a straight stitch.
At this point can flip your pocket right-side out and be done.
If you are like me, however, you are a little bothered by the way the outer pocket sags open. This is really easy to fix.

Flip the pocket that slides over the chair inside out. If you can see the side seams you have flipped the wrong pocket. Once the correct pocket is inside out, make a curved seam across the upper corner.  You'll start the seam 1 1/2 to 2 inches from the corner and end about an 1 1/2 inches below the corner.
Repeat on the opposite corner and trim the excess fabric.
Turn the pocket right-side out again and you are done.  It should fit snugly over the chair and the outer pocket should stay taut.

Now, fill it with books, paint brushes, scrapbook paper, whatever!

And enjoy!

Monday, November 15, 2010

PJs for a Drama Queen

You may be wondering what could have possibly kept me from posting on Friday.  Maybe you aren't, but I am going to tell you anyway. I made the 40 minute drive to Clearwater, FL for my first sewing lesson!

I know it seems odd that I would launch a business based on my sewing skills and then decide to take sewing lessons. My mom taught me some basic straight-line sewing and I've sort of picked up other stuff along the way but for some time I have felt I could be doing so much more if I just knew a little more about my machine and about various fabrics.

I was lucky to find Susan on Craigslist. I mean, I was super lucky.  She is the perfect teacher for me. She is so upbeat and sassy and the right amount of crazy.  I loved my time with her. I cannot beleive how much I learned in just over four hours.

So what does all this have to do with PJs?  Well, I had to make something during my lesson didn't I?  And what could possibly be more rewarding than some Emily pajama pants. I think Em might be pretty happy I took a sewing lesson as well:
I used Simplicity Pattern 2831. Emily can tell you these pants are perfect for pre-bedtime snacks,
dancing in the living room,
and lounging dramatically (and not at all posed).

You can see Emily is already putting her new pants to good use. I can't wait to do the same with my new skills!

Friday, October 29, 2010

All Hallow's Eve

Remember my to-do list earlier this month? Well it is time to see how we did turning this:
Emily in random thrift store prom dress
 into this:
Glinda, Good Witch of the North

We have one very important guideline when it comes to Halloween costumes - they have to be fashioned from a thrift-store find. No store-bought here. Emily actually decides on her costume the day after Halloween. And then she changes her mind 15 times.  Just in September of this year she went from Vampire to Peacock to Witch-with-a-fancy-hat to Glinda.  Once we select the "raw materials" for her costume, though, she is locked in.
She was pretty thrilled when we found a ball-gown style prom dress for $3.00. It started like this:
Every night it changed little by little:

Until it was all ready for her school parade this morning:
I was thrilled to find a roll of clear vinyl in the remnant's rack at JoAnn's Fabrics.  It was perfect for the wand and tall crown:
Emily...I mean, Glinda, looked great marching with Supergirl, a few princesses, and one or two cowboys.
There's nothing quite as challenging as a wedgie buried under a ball gown.
And this weekend we can look forward to some tricks and treats. Could you deny these pretty blue eyes?
Happy haunting!

Saturday, July 31, 2010

Gaining some skeels

The pending move to Tampa has put me into to sewing overdrive here lately. Not so much because of my new found need to make curtains but because I an eager to develop my skills (or skeels, as they say on the street). Without an Emily here this summer to enjoy fashionable new clothes of the homemade variety, I decided to make gifts.
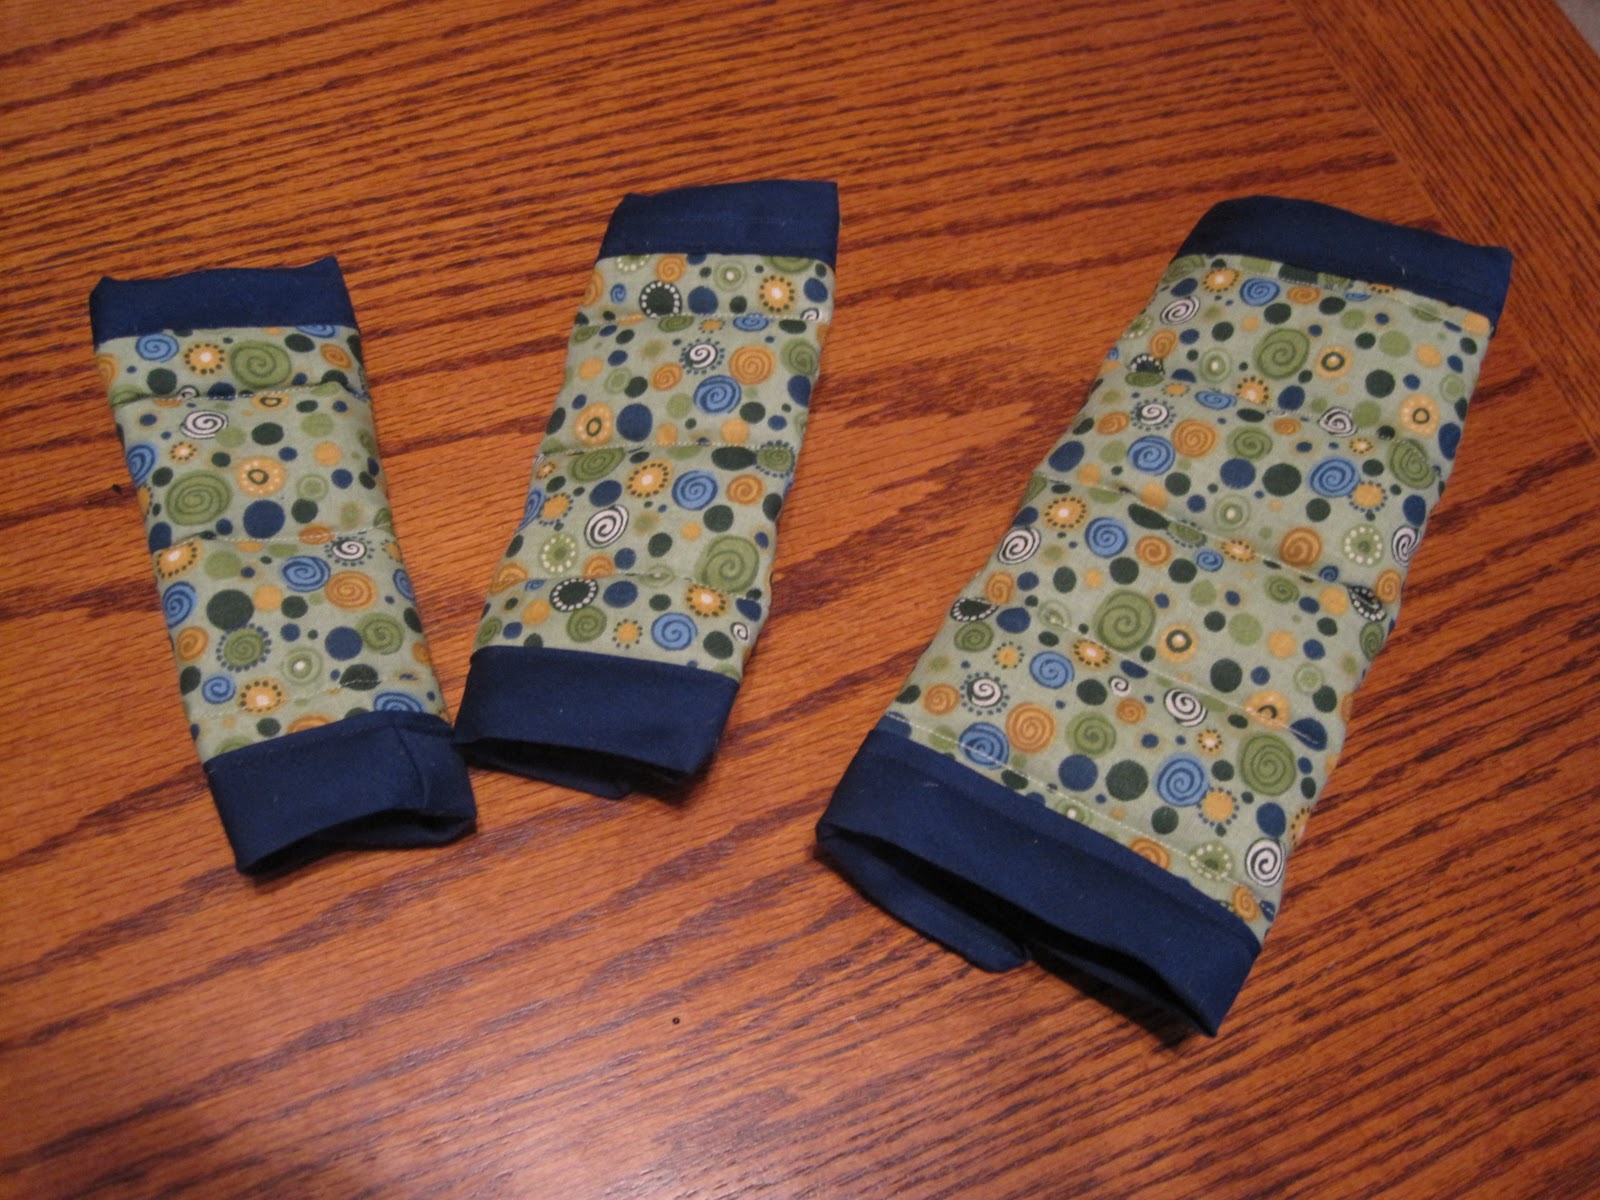
A few months ago, you may remember, I developed an obsession with the blog of one Ms. Ashley Johnston. I was inspired to make many of her projects but got around to only a few, one of which was the making of a seat belt cover to make Emily a little more comfortable during errands and whatnot. But what does that have to do with moving and gifts? Well, I've met some really great people here and, before I go, I wanted to tell them how much I appreciate the ways they taken care of me by giving them something that'll help them care for their kids. So:
The smaller ones are for the skinny double straps of a stroller or carseat while the bigger one is for the regular seatbelt of a big kid in a booster. See, nice and cushy:
I made this set for my replacement at the law office.  She is a precious woman who is just smitten with her two New York-based grandsons. I thought I did okay picking out fun boy material but when I showed Ben, the look on his face said it is a good thing we have a girl!